New Media Gift Guide # 3: Joby GP1 Gorillapod Flexible Tripod

# 3 Joby GP1 Gorillapod Flexible Tripod

Whether you are taking stills or video, a tripod always makes your work look better. These portable tripods by Joby give you amazing flexibility, both literally and creatively. With adjustable, bendable legs, you can use the tripod on a table or the ground as you normally would, or wrap the legs around a sign post or tree limb to make use of whatever your environment provides.

These tripods are a great complement to the Flip UtraHD video camera highlighted earlier, but also work with any camera with a standard tripod mount. Those with larger Digital SLR cameras will want to go for the beefier version — Joby GP3 Gorillapod SLR-Zoom Flexible Tripod for Digital SLR Cameras

All Gift Guide Recommendations:

Flip Video Cameras – 3 Current Models

I have added the 3 current Flip Camera models to the WelchWrite store. I have the Flip MinoHD and really like it. I carry it everywhere I go and it makes it easy to grab whatever happens while I am out and about.

The Flip UltraHD adds 2 hours of recording time, a removable battery and image stabilization.

Check out all the Flip models and I think you will find one that is right for you!

Ignore ALL New Media advice — maybe even this

Cookie cuttersAfter 6 years of podcasting and a deep immersion into the New Media world I find myself wondering if we all need to stop listening to New Media pundits and just GET ON WITH IT!

As with any new trend, meme, idea, service, product, whatever — there will always be those who think themselves experts in exactly how it should be done. You must post 1.4 Twitter messages each day, each being only 120 characters (to allow for Retweets and blog 2, 500-word blog posts each day, each with a call to action and comments specifically written to your target niche., etc, etc, etc.

Talk about sucking the life out of something!

My own advice, which you are — of course — free to ignore, is to “DO” New Media in whatever way seems fit, in whatever method seems fun or useful, on whatever time frame fits your schedule, directed at whatever audience you care to address. JUST DO IT!

Following too much advice can be more damaging than following too little. Each new pundit, each new expert hones and grinds New Media in their image. They take all that was new and exciting about New Media and turn it into yet another widget that can be commoditized and sold. They reduce the power of these new tools down to a lowest common denominator that seeks to serve everyone, but only seeks to serve them with mediocrity.

What good is it if you simply get better and better and doing what everyone else is doing? If you use New Media tools like everyone else in the crowd you become just one more anonymous figure within that crowd. New Media gives us the ability to stand out from the crowd, find our audience and make a difference in the world. Why squander it being the same as everyone else?

Every new idea goes through this phase? Goth was cool and edgy, now it can be bought in the mall. Punk music was loud and downright dangerous, now its commoditized just like Top 40 pop. Blogging used to be cool and cutting edge, now many do it with the same energy and excitement as a burned out accountant might bring.

Start with yourself when you develop your New Media projects. Sure, you can find some interesting ideas among the pundits, but when the advice starts to make everything look the same you would do better to think about how you can make your work different. Different is where new things happen. Different is where big success lies. Different is what keeps you from being swallowed by the big ocean of mediocrity.

What do YOU want out of New Media? How are YOU going to achieve it? What are YOU going to do? After all, if you are just going to do the same as everyone else — why do it at all?

Tip: Using typographical elements as graphics in blog posts

You may have noticed here that I sometimes like to use typographical elements — like the ?, ! and @ – as graphic elements in a blog post. Rather than go through the trouble of creating a JPEG, uploading it to the site and then linking it in with the IMG tag, I use this small bit of code below to render it out as text. Inline CSS styles allow me to easily size and position the element. This should work in nearly any blogging system, like WordPress and render properly in most or all browsers. You might also imagine using special characters like bullet signs, ™ and © symbols and more.

If you are looking for a quick way to dress up a blog post, give it a try.

…yields…

?
This is some sample text to show you the positioning of the typographical element. This is some sample text to show you the positioning of the typographical element. This is some sample text to show you the positioning of the typographical element. This is some sample text to show you the positioning of the typographical element. This is some sample text to show you the positioning of the typographical element. This is some sample text to show you the positioning of the typographical element. This is some sample text to show you the positioning of the typographical element. This is some sample text to show you the positioning of the typographical element. This is some sample text to show you the positioning of the typographical element. This is some sample text to show you the positioning of the typographical element. This is some sample text to show you the positioning of the typographical element. This is some sample text to show you the positioning of the typographical element. This is some sample text to show you the positioning of the typographical element. This is some sample text to show you the positioning of the typographical element.

Online Video classes need energy, passion and added value

I give a lot of training sessions — one-on-one, small group and larger sessions. I think this makes me a bit sensitive to issues when I am on the other side of the table. I cringe when I am faced with a class that is less than it could, or should be. Due to the freely available live streaming audio and video tools, it is easier than ever to create classes, but sometimes the fundamentals of teaching get lost in the process.

While attending an online course today via streaming video, I was struck with a problem that I hadn’t really thought about before. In classes where there is a large amount of prep work — installing several software packages, checking connections, trying a sample project — the first session can be quite daunting. Students are eager to dive into the topic and start working with the tools or information. If, instead, they are presented with an hour or more of setup, you are likely to lose them before you ever get started. I know for myself, today’s class seemed interminable. In fact, they may have lost me for the rest of the class. I will probably give it one more try, but if it isn’t significantly better, I will probably abandon the class in favor of more self-directed learning through others sources.

Of course, this got me thinking about how you can avoid problems like this, where the setup takes up an entire class session before the students can experience something “cool.” One way I would have approached it would to have had an online forum/discussion group setup a week or more before the live class, where students could work through the installation and troubleshooting of all the necessary software and materials. There could have been group leaders online to answer questions and help everyone prepare, so this information wouldn’t need to be covered during the first live class. The instructor could make the assumption that everyone was ready to go and could dive into the most interesting part of the information. This would provide a much more exciting and energetic start to any class.

The next separate, yet related issue, is that of instructor demeanor. Whether this was caused by being forced to address the setup issues in the first class, over-familiarity with their subject or general personality, the instructor of this online class showed no excitement about his topic. One can guess he is an expert in his field, but without any sense of passion about the topic it made the class a very hard slog. For me, when teaching in any environment, a certain amount of passion is expected, desired and, for me, required. If I can’t get excited about the topic, how do I ever hope to excite the students interest? How do I hope to help them (or push them) through the rough parts of the class, if I can’t make the topic interesting and applicable to them. How can I hope to enjoy teaching the topic if I am bored with it. A little excitement, a little fun, a little look into the cool stuff to come would have been very welcome.

Of course, classes are about information transfer — teaching students something — but without a certain amount of fun and passion involved they can become less useful than simply reading the material out of a book or web site. If you are going to “teach” a course, you need to add value to the information, not simply read it out. Your video needs to add value to the information in order to justify someone taking time out of their day to show up in a particular place at a particular time.

How do you add value with your audio or video projects? What passion to you bring to the screen? You would be well advised to think about these issues before you start. Share your thoughts using the Comments link.

Elsewhere Online: Jazz Up Your Next YouTube Video with Royalty-Free Music From Incompetech [Music]

Podcasters and other new media folks can always use some good music for their audio and video projects. If you aren’t a musician, have friends who are, or can’t afford a lot of money to license music, Incompetech can offer you some nice, royalty-free music.

They have music in a variety of styles and moods and a quick listen found several tracks I will use in upcoming productions. All that is asked in return is an optional $5 donation and/or credit in your project when completed.

Check it out!

I originally found out about this music from Lifehacker via Jazz Up Your Next YouTube Video with Royalty-Free Music From Incompetech [Music].

Question: Should I stay on Facebook?

Over the last couple of weeks, I have been asked this question more than a few times, both face-to-face and via email/Twitter. The on-going privacy policy battles with Facebook have turned off a lot of people on the large (and growing larger) service, but for the foreseeable future, if you leave Facebook, you might just be reducing your social media effectiveness.

First, let me say that I haven’t had a large problem with Facebook privacy settings for two important reasons.

  1. I joined Facebook after it had opened up for everyone, not just limited groups of high school and college students so I never developed an assumption of privacy there.

  2. As with any social media, I consider anything and everything I post there to be public by default, so changes in Facebook’s privacy policy didn’t really effect me or the way I used the service.

For most people, you want (and perhaps, need) to be on Facebook for one very important reason…it is where the people are. In shear numbers, Facebook far outweighs any other social network and will continue to do so for the foreseeable future. Removing yourself from that mass of people will limit the effectiveness of any social media campaign, both person and professional, that you might care to create. You need to connect with the quorum of people that exist on Facebook to spread your message as far as possible. Deleting your Facebook account might make your feel better, but your online relationships and business will suffer.

Will Facebook always be the big event in town? No. History has shown that companies ebb and flow over the years and sometime, somewhere, someone will create a new and better service and will do to Facebook, what it did to Myspace (and others). Until then, we all need to “dance with those that brought us.”

That said, if you want to continue to have private conversations via Facebook, you need to look elsewhere. Facebook has shown every indication that they will be “public by default.” Even if you manage your Facebook Privacy Settings perfectly, you will be exposing your “private” updates to any number of people. Look towards closed email lists or other services which promise closed communications and leave Facebook for your public-facing activities. Remember, though, that even then information can leak out of these so-called “private” realms very easily. A forwarded email, a Twitter message, a casual mention by a fellow group member over the phone show you just how fragile privacy can be. In some cases, the only way to truly private about something is to be the only person who knows about it.

You need to engage on Facebook, publicly, if you want spread your message and thoughts to the widest audience possible. Move your private conversations elsewhere. Facebook isn’t going back so you need to do what is best for you.

Show recommendation: FilmRiot from Revision3

I had some open time in the last few days and I have spent some time finding sites and shows that can help you make your New Media projects even better.

The first show I am highlighting is FilmRiot from Revision3. The production quality is quite high and the content is very good. There is a bit of silliness in each episode, but in reviewing several episodes I found some really good hints, tips and tricks you can put to use today. Embedded below is a recent episode entitled “Turn Your Tripod Into a Dolly or Jib!: Learn how to use your tripod as a dolly or jib, then learn about using different camera techniques to enhance your story.” These are simple hints, but for those of us working on small budgets and with heavy time constraints, they can quickly bump up the quality of our projects.

You can subscribe to FilmRiot and download previous episodes from the FilmRiot site.

Question: How do I set up a WordPress blog with a static page as the home page?

?

I get a lot of questions every day and here is a one from today…

  • Q: How do I set up a WordPress or WordPress.com blog to use a static page as the opening screen instead of a list of blog posts?
  • A: I first turned to the WordPress Codex to give me some guidance on this. You can read more in this here – Creating a static front page.

    Basically, you create the WordPress Page you would like to act as the front page for the site. Put your home page content here. Then, create another page and name it Blog, Posts, or whatever else makes sense to you. You need not add anything to this page, as it is only a placeholder to contain the usual posts you would see in a more typical WordPress blog.

    Next, from the WordPress Dashboard, select Settings, Reading. Under the first option on that page (Front page displays) select the radio button next to “A static page”. Then in the popup menus immediately below that, under Front Page, select the page you created to act as the new front page. Under the Posts page, select the second page you created named Blog, Posts, etc. Scroll to the bottom of the page and click the blue “Save Changes” button.

    Now when people visit your blog, they will see the static page you defined. You will need to include a link to the Posts page in the sidebar or header in order to allow people to access your blog posts.

Do you have a question? Why not drop me a line? Use the Comments link above, send email to me@douglasewelch.com or call the voice mail line at 818-804-5049

Video: Different methods of presentation – 2 vacation videos

We recently returned from a trip to the UK and I took several videos while we were there. The 2 videos below show 2 different methods of presenting a location to your viewer.

The first is this time lapse video of a “flight” on the London Eye. It seemed to me that presenting clips from the slow moving ride, or posting the entire ride in real time wouldn’t really give the feeling that I was looking for.

To capture this footage, we immediately placed our Flip Mino HD on a table top tripod on the floor of the capsule. You may notice that there was at least one time when we adjusted the few, but for the most part the video was just captured as we enjoyed the view. The movement of the boats and cars offers a nice contrast to the slow movement of the Eye itself.

In order second video, we did the opposite. Instead of speeding up time, we slowed it down…at least figuratively. Using the concept of a “long picture” I took 3 views of Stonehenge, again using the tripod, but rather than moving around like most videos would, these are 2 static shots.

I believe this gives a great feeling of what it would be like to be sitting there on the grass with us. The audio was captured from a group who were chanting nearby and I thought this added an important element, too.

You can see more examples of these “long picture” videos in this Places UK: Cardiff Bay and Water in Millard Canyon.

Videos don’t have to be like every other video on the Internet. Experiment with movement, stillness, profiles, interviews and any other videos that you can imagine. You never know what you might discover.

What do you need to live video stream your event?

One of the most common questions I get asked as a New Media consultant is “How do I live video stream my event?” The fact is, the technology part of the live streaming equation is easier than ever before, but it still requires a little bit of equipment and, more importantly, good planning to get your live video stream up and running.

…requires a little bit of equipment and, more importantly, good planning…

Time to prepare

First, you need to give yourself some time. I often receive requests and questions about live streaming the day before, or the day of, and event. If you haven’t been streaming your events before, this is usually not enough time to do more than the most basic of video streams. This doesn’t usually have anything to do with technology, but more to do with logistics.

Depending on what you are trying to accomplish you might simply have a laptop and webcam which is pointed at a stage or a speaker. Even then, though, you will need to have some basic knowledge of the different types of live video streaming services out there and what they can do. Ideally, you will want to do a “sound check” earlier in the day or even the day before your event to make sure you don’t have any issues with the local network, web cam and service. You will need to set up your account with the streaming service and learn how you can embed and link to your stream during your event.

Time to promote

This points to another issue with time, too. If you want to attract an audience to your live video stream, you need to give them plenty of notice. They will need to place the event in their calendars and plan around it just as they would if they were attending in person. This is one of the limitations of live streams, of course, you still need to be in a particular place at a particular time, even if that place is only on your own sofa.

Ideally, you want to promote your event 2-3 weeks ahead. Then you will also want to remind people 1 week before the event, 1 day before the event and finally, right before the event starts. You will want to embed the player for the live stream on your blog and/or web site so people can easily find it and even stumble across it if they have forgotten about the event.

Adding complexity

Live video streaming from one location is the simplest to set up, but often show hosts and producers what to take live callers, or even live video calls, during their event. While it is possible to do this in a number of ways, be aware that the complexity of your production will increase dramatically.

You will probably want, if not need, additional computers, higher speed Internet connections and more people to handle the technology…at least initially. Once you get things up and running, you might be able to produce your show by yourself, but allow yourself some “helping hands” at the beginning.

Saving it for later

You will also want to make arrangement to capture the video from your event for those who weren’t able to watch it live. The fact is, the size of this audience is often much larger than the audience watching live. You can deliver this video via YouTube or other video sharing site, embed it on your web site or blog or even sell it on DVD to those who might want to own a physical copy.

Do you want to learn more about live video streaming and how to get it working for your event? Add your comments here or email me at me@douglasewelch.com to set up a phone or in-person consult.

Remember, allow yourself plenty of time before your first event so you aren’t struggling with the technology while also trying to organize your event.
Claim your business online with Foursquare and Google Places

Location is hot in the technology world lately. As new services are created and achieve some sort of traction it is always a good idea to try each one. You never know how useful any particular service might be, especially until you give it a try.

Recently, both Foursquare and Google Places (originally Google Local) have opened up a new selection of services for business owners. You can now “claim” your business, your store, your venue and control the information that is shared via Foursquare check-ins, Google Search and Google Maps. Location is destined to be the next big thing, so organizing your own piece of location “real estate” could pay big benefits in the future.

How to claim your Googles Places listing?

  • Visit http://places.google.com and login with your Google Account
  • Click Add Listing
  • Enter in your business information
  • Google will perform a search looking for an existing business in your location
  • Select your business and Click “Claim Listing” or, if your business was not found, select “Add Listing”
  • Complete the questionnaire regarding location, hours and more and click “Submit”
  • You will then be asked to verify your listing by phone or mail. I used the automated mail system to verify my listing in about 2 minutes.
  • Now your Google Places listing will include  the label “Owner-verified listing”
  • If you perform this verification first, you can use your Google Places page to verify your Foursquare venue in the next step

How to become a manager of a Foursquare Venue

  • Visit http://foursquare.com
  • Search for your business or venue
  • If found, click the link “Are you the manager of this business?”
  • Step through the 2 steps, using your Google Places URL, Yelp URL and others to verify your “ownership” of the Foursquare venue.
  • As of yet, my Foursquare registration has not been confirmed or denied, but they also don’t list a timeline for confirmation of that registration.

Any questions? Drop a comment using the link above and I will offer whatever information I can.

Douglas talks about pocket camcorders on New Media Tea Time

Co-hosts Tracy Pattin and Danielle Gruen talk flip cam and shooting videos with New Media and IT guru, Douglas E. Welch of New Media Interchange. Doug joins New Media Tea Time and yes, via Skype! We are so delighted to have our “go-to-geek” guest starring once again.

[Tip] New Media Assignment: Capture your great ideas

Book and Book - PaD 1/5/07When I am talking New Media, one question that always arises is, “…but what do I have to say that people will be interested in?” That fact is, we all have something interesting to say. We just don’t take the time to recognize it for what it is. We let it slip away instead of turning it into the powerful new media it is.

Assignment #1: Capture your great ideas!

Everywhere you go, take notepad or journal. This is both your capture device and your reminder to be aware of opportunities to gather great ideas. The act of carrying it around, setting it on the table when you sit down at the cafe, putting it your bag is like tying a string to your finger or snapping a rubber band on your wrist.

Now, whenever you are talking with someone, be aware of when you and they are particularly enjoying the conversation. Are you laughing out loud? Are you ranting? Are you commiserating over some lost opportunity, job, lover?

Now, write down in your journal the topic of your conversation. It doesn’t have to be a detailed reconstruction of the conversation, just a quick line noting the topic and perhaps why it was so interesting.

Before you know it, you will have a whole series of pre-vetted ideas for blog posts, audio podcasts, videos and even books. You already know these topics are interesting to you and at least one other person, so you can turn them into something more without worrying about whether they are interesting enough — a common pitfall of folks just getting started in New Media.

Do you accept my assignment? Start doing it today! Share your stories about how it works for you as comments here on the blog of on the New Media Interchange Community site. I’d love to hear what your are capturing and how this tip works for you.

Feedburner Email Subscriptions

If you use Google’s Feedburner service for managing the RSS feeds for your blogs and podcasts, you may, or may not, know that Feedburner also provides email subscriptions to your RSS feeds. Some people prefer email to RSS, so they might be more comfortable receiving your blog updates in their inbox.

You can turn on the Email subscription feature for your Feedburner feed by logging into your account and then clicking on the Publicize tab. In the left-hand column, you will then see the Email Subscriptions link. Click that link and 4 sub-topics will appear.
The Subscription Management link allows you to grab the code for an HTML form that you can embed in your blog to allow users to subscribe with one click. You will also find a listing of those people currently subscribed to your RSS feed via email. The Save button at the bottom will activate the service, if it isn’t already and save any settings you might change.

The Communication Preferences link allows you to see and edit the messages sent to those people who subscribe via email. You can change the text of the welcome message, including whatever information you would like them to have.

The Email Branding link provides access to the standard subject line, blog artwork and styling of the email sent to your subscribers.

This review of the email subscription features was driven by an email I received from a subscriber noting the small font size of the messages they were receiving. I hadn’t realized it, but the font size of the message in this section had been set to 9 point, much too small for the average reader. A quick change here solved the problem for everyone receiving these emails.

The final link, Delivery Options, allows you to set your time zone and the time of day when you would like your email updates to be delivered to your subscribers. Mine are scheduled to be sent between 7am-9am Pacific Time.

Readers will consume your web content in any number of ways, so providing alternative methods, like email subscriptions can help you add to your subscribers as well as capturing email information about your users — something that is nearly impossible using RSS feeds alone. If you haven’t checked your Feedburner Email Subscription settings recently, check it out. You might be pleasantly surprised at their usefulness.

10 Tips for better Skype Audio and Video Calls

Just 10 simple steps to insure that your Skype calls (and other VOIP calls) are as high quality as possible.

  1. Shut down resource hogging program and services
    • If your computer is busy doing something else, it is not giving you all the power you need for your Skype call. Shut down your Instant Messenger, Twitter program, Email program, etc.
  2. Stop all downloads and uploads
    • Don’t try to buffer that video from YouTube or upload your latest video to Blip.tv. Skype needs that network bandwidth for your call
    • Make sure no one else is hogging your network. Shut down computers to make sure.
  3. Use headphones
    • While Skype is better than ever at quashing echo from either end of the conversation, headphones stop it cold. Take a cue from live TV news. Put in one earbud and drape if off the back your ear and down you back, if you don’t want it to be seen.
  4. Don’t send video if you only need audio
    • Save the network bandwidth and only send video if you really need it. It will insure that your audio stays as solid as possible, even if you network connection gets a little slow.
  5. Get close to your microphone
    • In most cases, you laptop microphone is fine, but the better your microphone, and the closer you are to the microphone, the better the audio quality. Use a nice condenser mic on a stand or lavaliere mic clipped to your shirt.
  6. Find a quiet place.
    • Background noise is more disruptive on a Skype call than a telephone. Make it easy on yourself and find a quiet place to talk.
  7. For video, choose a pleasing, uncomplicated background
    • Complicated backgrounds (and clothing patterns) mean more work for video compression programs and more network bandwidth. Keep it simple and make it easy on your computer
  8. Test your computer and network before you need it
    • Before any important call, do a test using the computer and network you will be using for the actual call, if possible. As is often said, “an ounce of prevention is worth a pound of cure.” It is so much better to identify problems before you are under the pressure of the actual situation.
  9. Stay with the most current version (not beta) of the program
    • I have had issues in the past with 2 different versions of Skype working well together. Sometimes it can’t be avoided, but if you have having connection or quality issues, check that you are using similar versions.
  10. Try not to talk over/interrupt one another
    • This can be difficult, as you can’t see each other on an audio call, but establish some sort of protocol with your caller so that you don’t end up talking over each other, or asking each other to repeat something that was missed.

More resources on using Skype:


What is your favorite Skype tip? Tell everyone by clicking the Comments link below.

2 Great Ways to Engage Fans Who Don’t Like Your Advertising Campaign (and more)

I received an interesting message today from a fellow LA Tech traveler. She hosts a major event but was getting some push back on the advertising poster that was designed and released. She asked a couple of questions about how she might deal with this push back and turn it around into something positive.
Off the top of my head I came up with 2 ideas.

First, instead of hiding from the controversy, engage it. Post a poll on the web site and send it out to the mailing list of interested people. What don’t they like about the poster campaign? What would they change? What would they keep? Controversy is great at driving discussion and shouldn’t be avoided. You could be developing some of your biggest fans through just such a conversation.

SurveyMonkey (and many other sites) provide free embedded polls. You can also use Google Docs Spreadsheets to make your own surveys and show live results to those voting.

Second, if the fans don’t like the ad campaign, have them design one of their own. Put their talents to use and have them show you — via text, photos, audio, video, whatever — what they would like to see in the promotion. I must admit this is better to do BEFORE you have completed your own ad campaign, but I also think it is a great response to the people that took issue. Give them a chance to express themselves in some other way than simply saying “I hate it!”

An Example Survey using Google Docs

Video: Career Prescriptions – A Talk to Tuesdays with Transitioners

I presented this talk to Tuesdays with Transitioners, a local group dedicated to helping workers recover from layoff and make the move to a new career. All of my prescriptions use new media in some fashion, so I thought this video would be a good inclusion for Careers in New Media.

Visit the Tuesdays with Transitioners site for more information on this great group.


Support Career Opportunities:

iTunes Review | Career-Op Community Site | Podcast Alley

Reader/Listener Line @ 818-804-5049

You don’t need to follow everything – pick one!

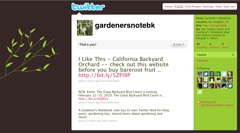
Yesterday I posted a note to my gardening blog, A Gardener’s Notebook, announcing that I had started a Twitter feed for the blog and the shared items I find using Google Reader. One of the first comments I received on the post talked about feeling overwhelmed at “having” to follow this social media service and that social media service and basically suffering from information overload.

As a rule, it is not intended for you to subscribe to every social media service where I (or others) provide information. You only need to choose one.

The average user thinks that just because a publisher, like myself, has provided an information source, they MUST pay attention to it. In fact, each user instead needs to select the source of information that works best for them.

In my own case, I tend to rely on RSS feeds and Google Reader to manage my information flow. Sure I use Twitter and Facebook and more, but when it comes to “reading” blogs and other information sources, RSS is my go-to source.

That is NOT to say that everyone lives like I do, though. Some people live in Facebook and spend little time elsewhere. Others love Twitter or Myspace or Email subscriptions. As a “publisher” it is in my best interest to reach as many people as possible, so I provide my content on as many services as possible. Then, each person can select whichever way they want to consume my content.

That is exactly what you need to do — pick your favorite and make great use of it. Don’t worry about the Twitter feed, the Facebook Fan page or others if they don’t interest you. They are designed for others.

Video: Douglas guests on New Media Tea Time: Part 3

I had a great time recording 3 episodes of New Media Tea Time on Friday with Tracy Pattin and Danielle Gruen. Here is episode 3. You can watch it below or subscribe to the New Media Tea Time podcast in your RSS Reader.